3 - Setup Firebase
In this section, we will see how to set up Firebase, set up google authentication and, connect Firebase to WordPress plugin and app.
You can also follow along with this video.
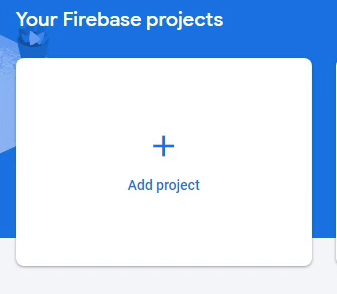
Create a Project#
Go to your Firebase Console. and click Add Project to create a Project. Then follow the wizard and create the Project. make sure to enable Google Analytics in the wizard.
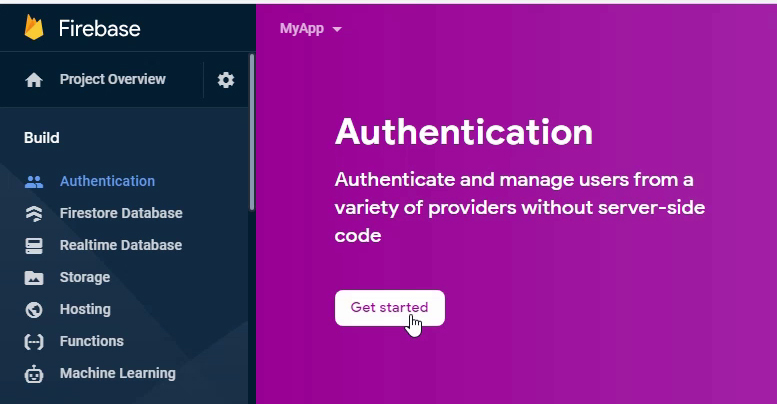
Enable Google Authentication#
After creating the Firebase Project open your Firebase Project.
Navigate to Build -> Authentication on the sidebar menu.

Then click Get Started button.
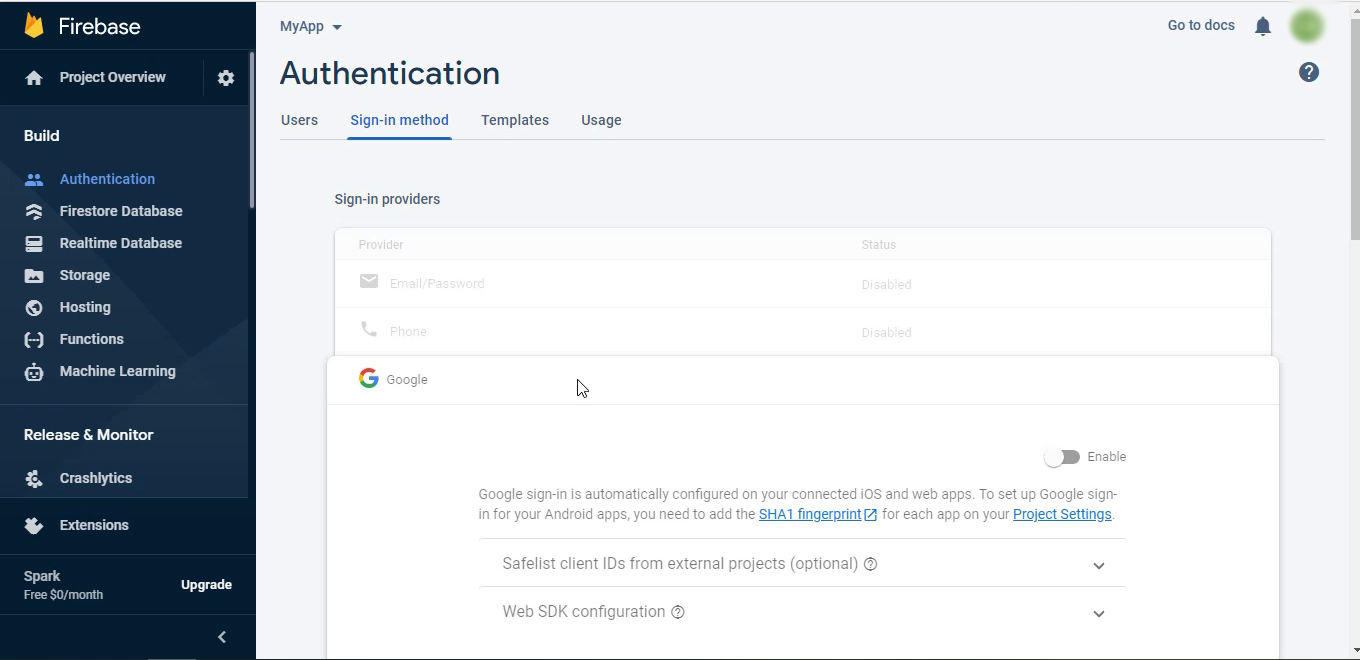
Then click the Sign-in method tab. and scroll down to Google and click on it.
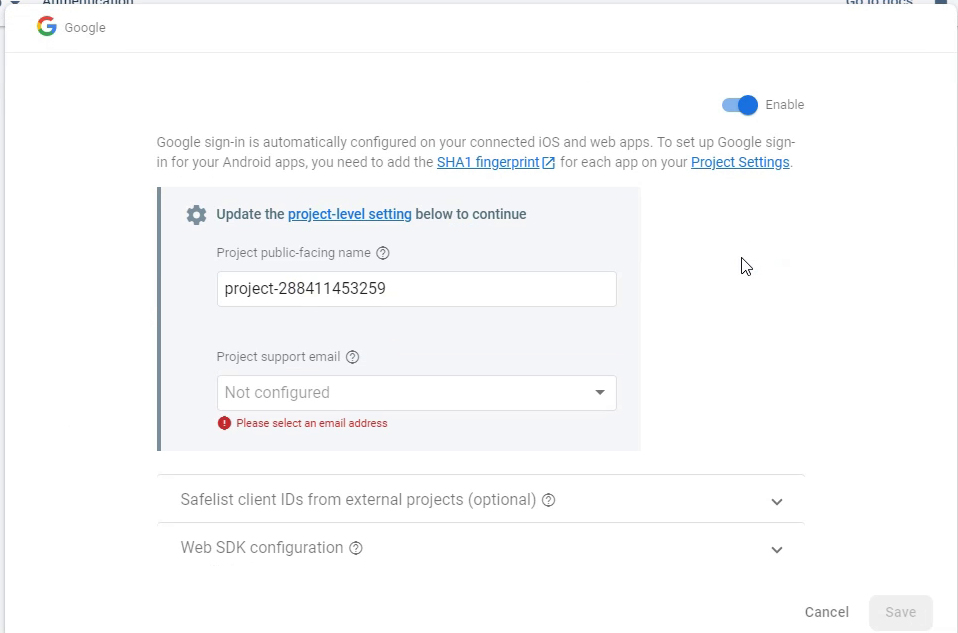
Then toggle the enable button to enable the google sign-in, and select the Project support email from the dropdown menu and, click Save.
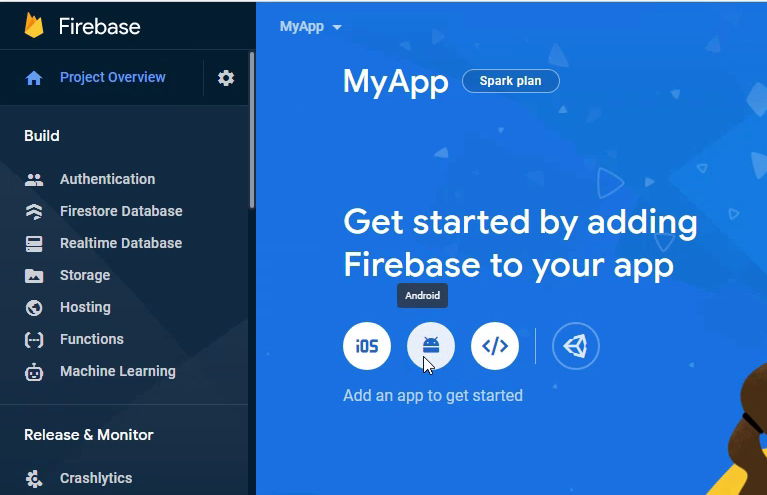
Add Firebase to App#
warning
Before proceeding with this step make sure you have your debug certificate. Find out how to get debug certificate here.
Go to Firebase Project home, and click the android icon to open the wizard.
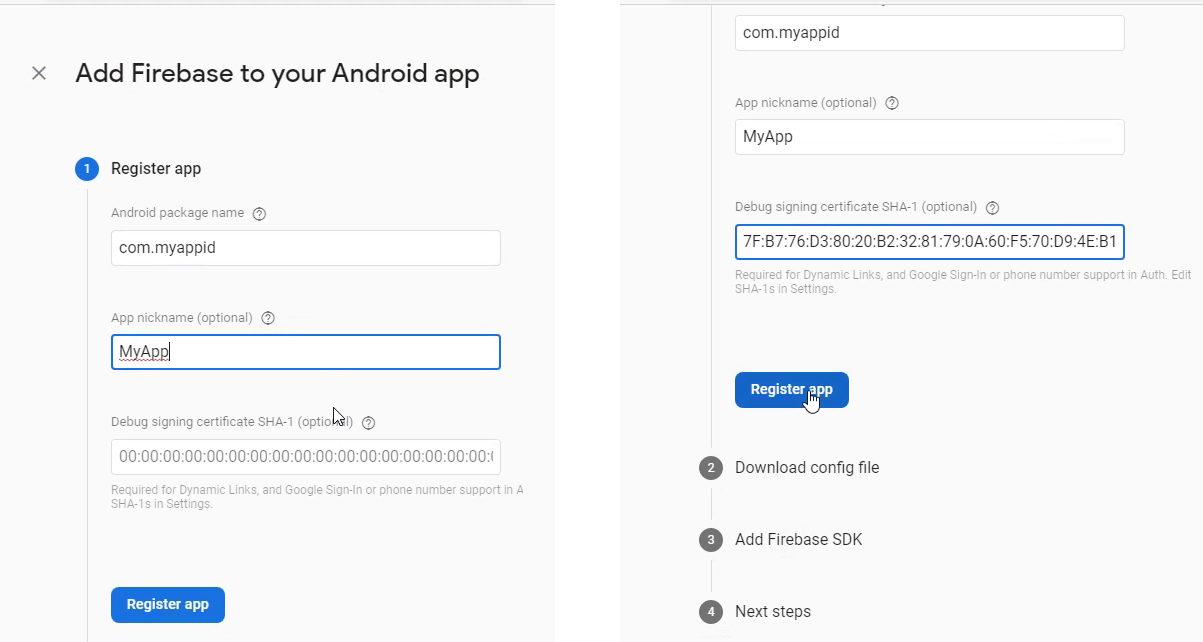
Then on the wizard enter the app details and click the Register App button.
After that, click the download button to download the config file.
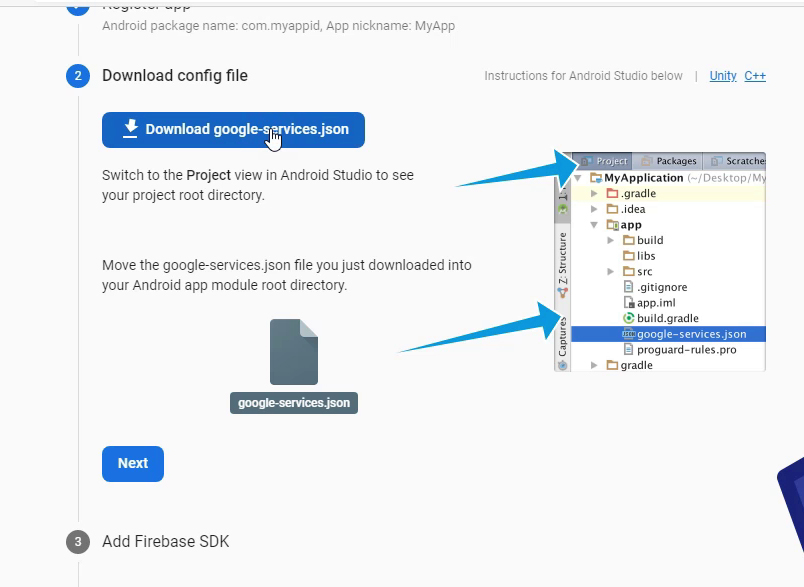
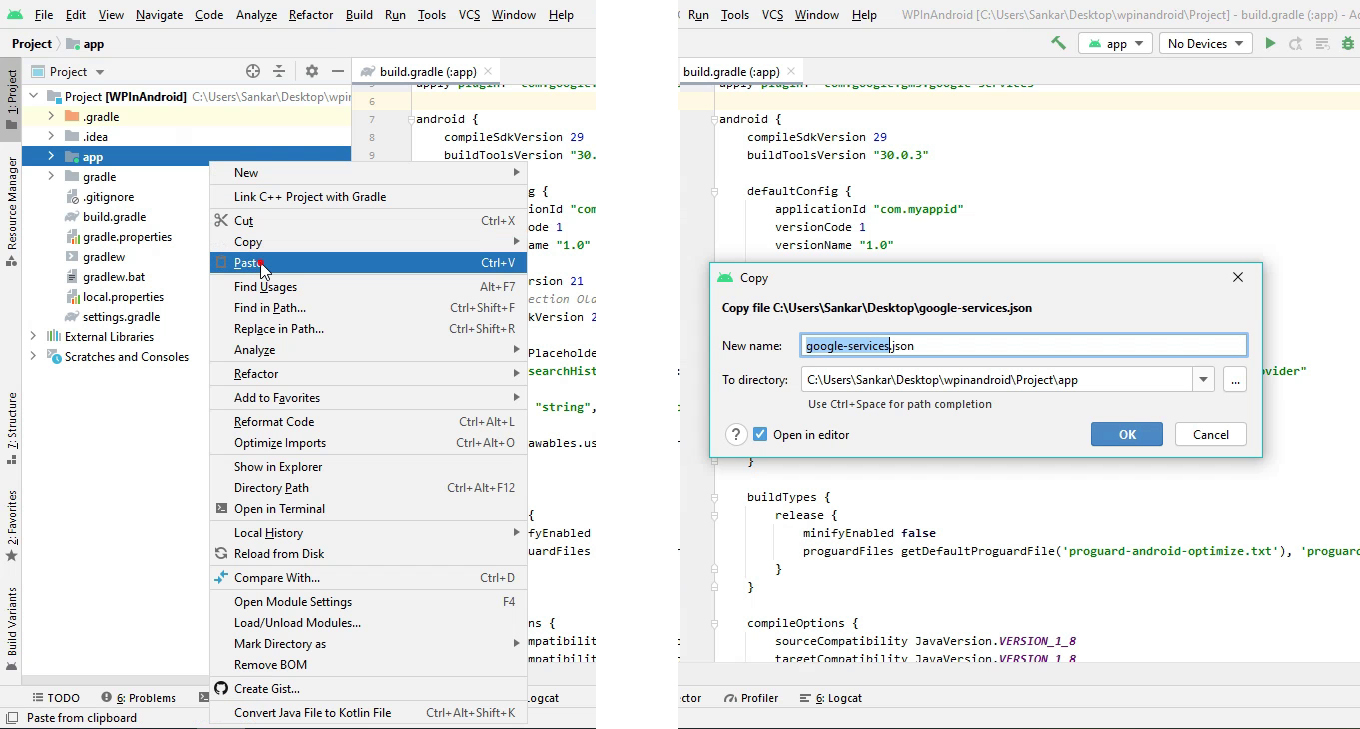
when the download is finished copy the downloaded file to Project folder and paste it in the app folder.
Then on the console, click next button on steps 2 & 3 and click continue to console on step 4 to finish the wizard.
Connect Firebase to Plugin#
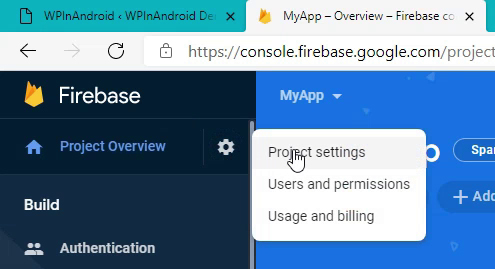
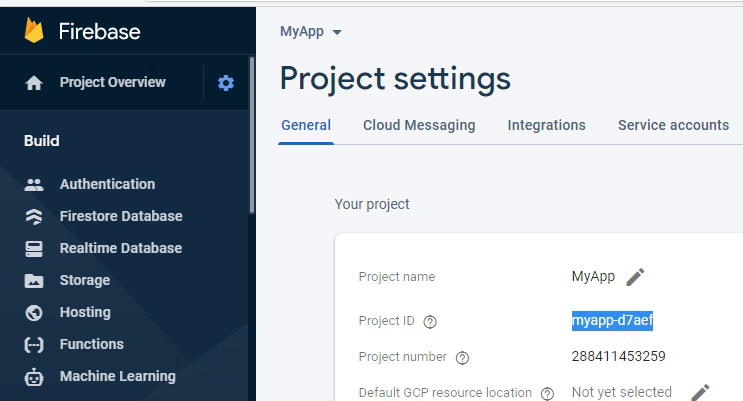
Open the Firebase console home, and click the gear icon on the sidebar menu, and click Project Settings to go to Project settings.
Then on the settings screen copy the Project Id.
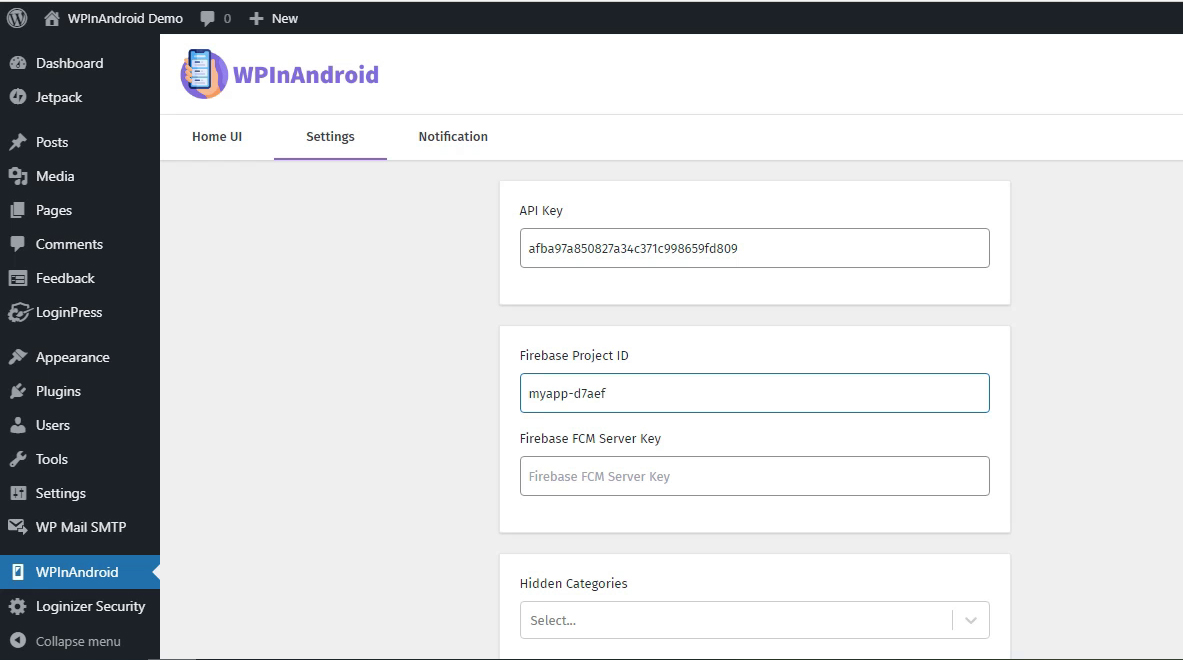
Then open the WordPress admin panel, navigate to the WPInAndroid page, and click the Settings tab, and paste the Project id on the Firebase Project ID field.
Then go back to Firebase Project settings, and click the Cloud Messaging tab, and copy the server key.
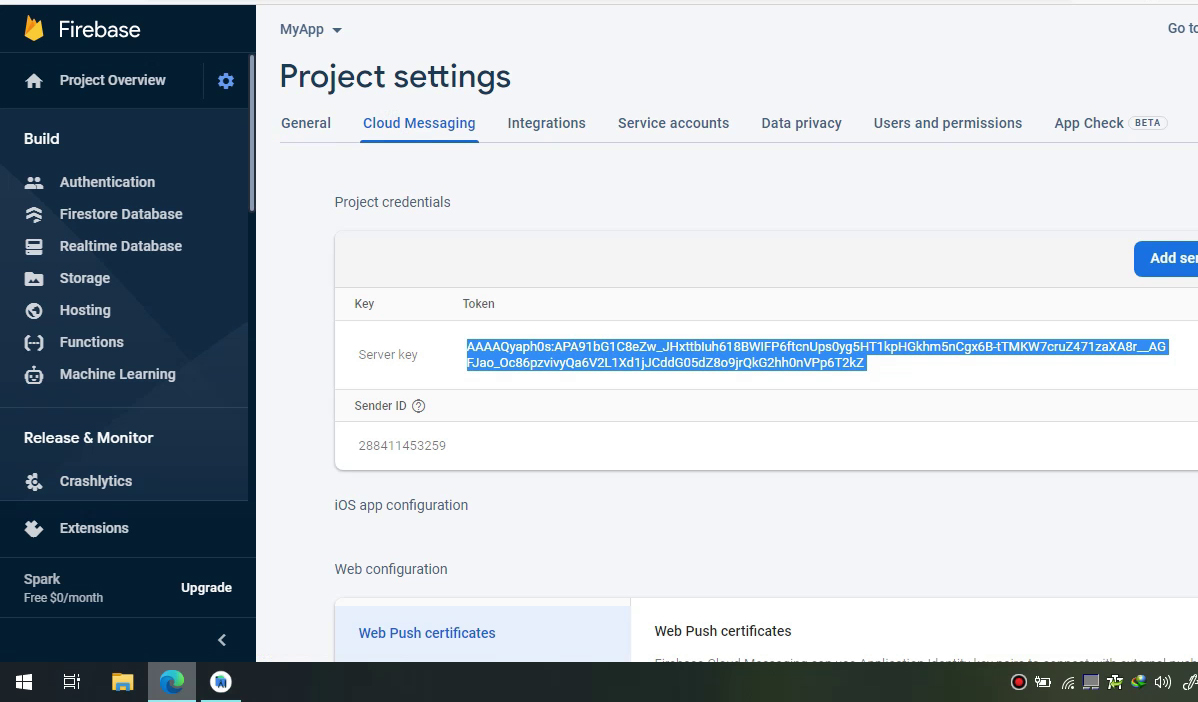
Then paste the server key on the Firebase FCM Server Key field in the WPInAndroid settings page.
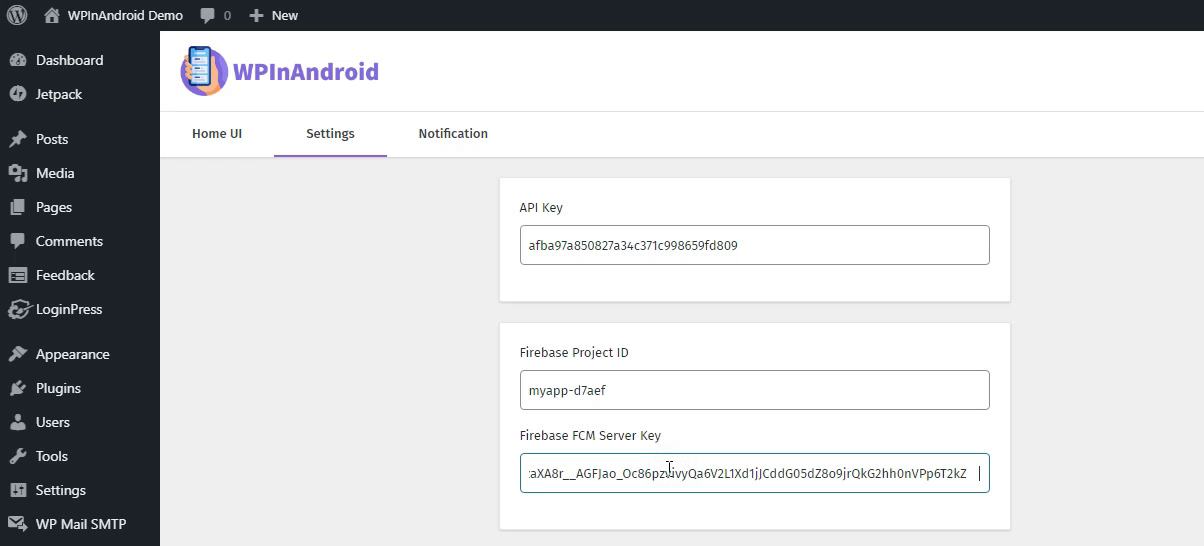
And don't forget to click save on the settings page.
